
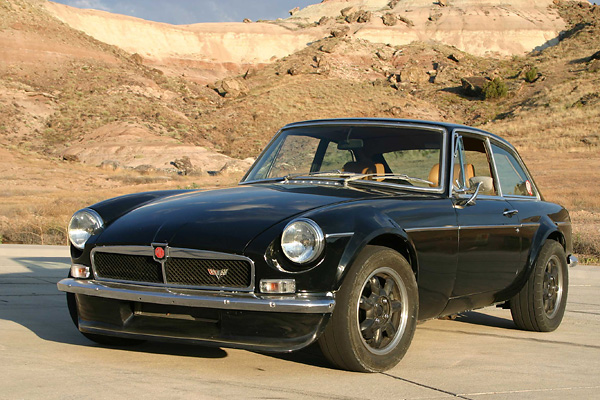
Keith Tanner's 1972 MGB GT with Chevrolet LS1 5.7L V8 Engine
as published in BritishV8 Magazine, Volume XX Issue 1, July 2012
Owner: Keith Tanner
BritishV8 UserID: Keith
City: Grand Junction, Colorado
Model: 1972 MG MGB GT
Engine: Chevrolet LS1 V8
Built by: Keith Tanner of Flyin' Miata
"How It Was Done"
This is a pretty heavily re-engineered car. There are almost no moving parts left with an MG part number.
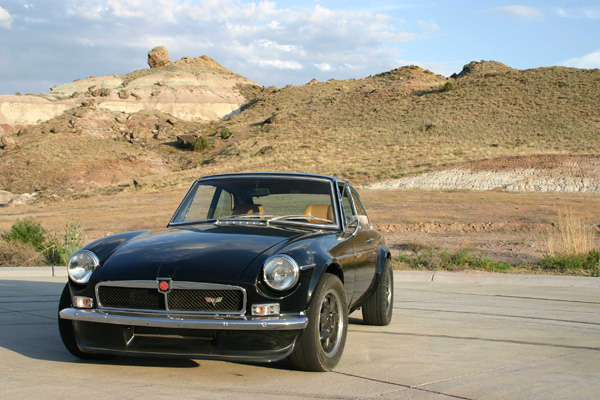
The goal was to keep the look and character of the MG while giving it modern handling and a big rumble.
I did rather get carried away. The original plan was simply to put a 302 in the car so I could get the
rumble and a fun character. We'd met up with Curtis at the racetrack while testing, and my wife Janel
really took to the body style of the GT and the noise of his exhaust system. She'd wanted a
911 but the shape of the MG seemed to scratch the same itch, and she's a sucker for a V8.
We found the GT in California and was almost completely rust-free. That was the best thing about it, though.
It had some pretty poorly done modifications, a spray-painted interior and two coats of paint covering the
original Aqua. I was originally going to get it up and running before I took it apart for the swap, but some
fundamental wiring problems stopped that after just one 6 mile trip.
At this point, I had to put my MGB V8 project on hold to concentrate on the Miata I was building for the
Targa Newfoundland. I also had the chance to be involved in building a Miata with an LS1 engine - the modern
all-aluminum version of the venerable Chevy small block. After seeing one out of the car and experiencing
how it all worked behind the wheel, my plans changed and I decided to put a big Chevy engine into the MG.

An almost completely rust-free MGB GT, sourced from California.
I've got a lot of experience working on Miatas, so I used as many components from those cars as possible.
For one, it allows me to swap wheels between various vehicles and it means I have spare parts that will
fit almost everything. Plus, it's a solid, reliable platform to use as a base.
The whole thing was built at home in my garage on a set of jackstands in a space just a bit larger than
the GT. Everything from the frame construction to the bodywork and paint to the design of the headers
and exhaust was done by myself. The only thing that was farmed out was the installation and setup of the
differential in the rear axle.
Please support the sponsoring companies who make BritishV8 possible, including:

The first step was to tear the MG down almost completely. I cut out the frame rails and most of the
sheetmetal in the engine bay to start working on the suspension. I decided to match the Miata's front
suspension geometry because it fit well with the car and because it just works so well. This did mean
the track was going to be 4" wider, but I decided I'd rather have a proven suspension geometry than one
that was handicapped by packaging. The V8 would have fit between the stock frame rails, but I knew I
could make the car better and lighter by starting over. I leaned on my Miata suspension background and
specified a set of custom AFCO shocks that gave me lots of potential for setting up the handling. I
also ensured I had a good bit of travel to help the car absorb rough roads with aplomb. The Miata
provided control arms, uprights, steering rack, steering column, sway bar, brakes and wheels.
I created a rear suspension based on the Fast Cars three-link design, although instead of using a
Ford 8" axle I chose a Chevy S-10 Blazer rear end. This has the correct track width to match up to
the Miata front end. Custom Moser axles gave me the same bolt pattern as the Miata. I welded on
brackets and mounted a set of Miata rear brakes.
The donor for the drivetrain was a 1998 Chevrolet Camaro that I purchased as a running car. I drove it
while I worked on the suspension modifications on the MG so I could debug the drivetrain and keep the
parts accumulation to a minimum. Just after Christmas 2009, the Camaro drove into the garage for the
last time and we tore the engine out. The engine was dropped into the MG for the first time that same day.
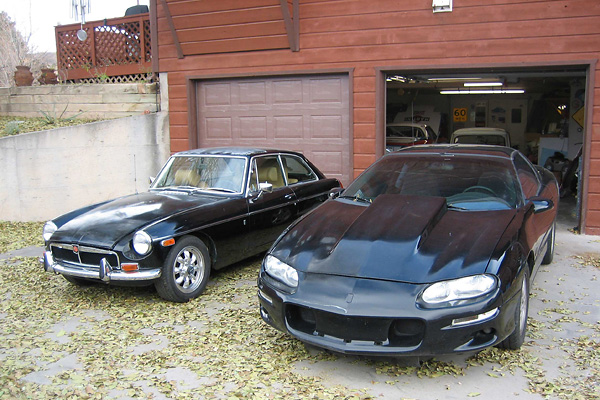
1998 Chevrolet Camaro, purchased as a running car.
It was a bit like building a ship in a bottle. All of the clearances in the car were tight. If I had
1/4", I knew I was good. The steering column actually passes between the headers and the block, and
I needed to use a Miata column because it has smaller universal joints than the MG parts. The water
pump pulley tucks in between the two cooling fans on their aluminum shroud. The footwells were both
slightly modified to clear the bellhousing. Surprisingly, there was really very little modification
required to the interior itself despite the size of the T56 6-speed transmission.
Thanks to the extensive surgery in the engine bay, I was able to fit the engine surprisingly well.
The radiator is the same part used in Miata builds at Flyin' Miata, a very efficient dual-pass
design with a specially designed fan shroud and two burly Spal fans. Cooling is not a problem,
despite the desert heat in Colorado.
The braking system consists of an MG power brake booster, a 1" Wilwood master cylinder and Miata
components at all four wheels. I installed an adjustable proportioning valve on the car so I could
fine-tune the brake balance. It's not a strong enough setup to deal with extended track use, but it
works well on the street.
The exhaust system was designed to be as quiet as possible. The coupe body is more prone to resonances,
and this is meant to be a GT. Packaging two headers with large diameter tubes as well as a full dual
exhaust system with an X-pipe was a challenge for sure, and it required some very careful placement to
clear the suspension and everything else. I started by poring over parts catalogs for muffler
specifications and then chose the locations for them. I then started from the headers and worked back.
Some special cutouts needed to be made through the transverse floor support, but these were reinforced
with thick wall pipe.
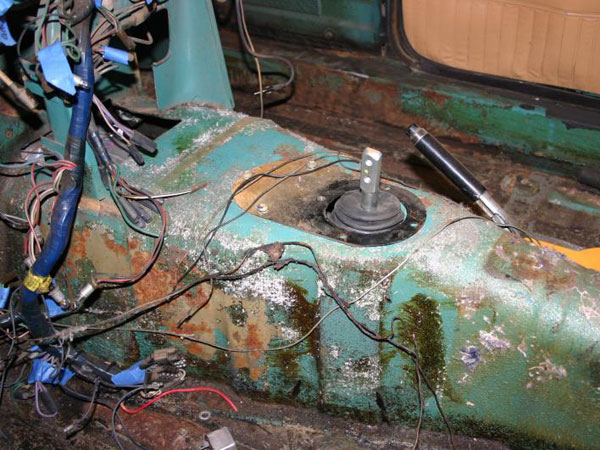
I cut the fuel tank open and reworked the internals after suffering some fuel pickup problems.
There's now a nice baffle ensuring constant flow to the pickup as well as a dedicated return line.
An external Pierburg fuel pump feeds a Corvette fuel filter/pressure regulator. There's also a
flapper door in the fuel filler neck to avoid splashing fuel out the cap under hard cornering and
acceleration.
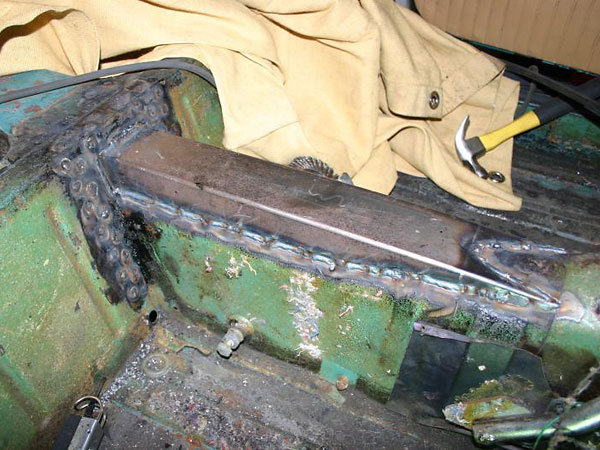
Other reinforcements were added under the car. The new front frame rails were extended back to the
transverse member, tied in to the originals. A strong 2"x2" tube was welded to the suspension
pickups in the rear and ran forward to the transverse member. Inside the car, a reinforcing brace
was added on top of the transmission tunnel.
Two years after the MG was pushed into the garage, it emerged into the light under its own power.
It was nowhere near done, but it worked! Three weeks later, it was seeing semi-regular use as I
debugged the car.
Once it was up and running, I turned my attention to the bodywork in March 2011. First, a steel flare
from a Mk1 Rabbit was welded on to each corner. I used VW's rear flares on both front and back of the
MG due to how they fit. I blended them into the body, then started doing the final smoothing and
shaping before paint. It took a lot of sanding to get the shape of the car just as I liked it. The
final color coat was shot in June 2011. Suddenly, the car looked very different, much smoother and
more purposeful.
The interior didn't see a lot of work other than some refreshing. A modern Smiths electronic
speedometer lives beside the original gauges, and the center console from a 1969 model replaced the
1972 armrest because I liked it better. If you don't spot the Miata combination switches, it almost
looks like a stock interior. One thing that is unusual is the biscuit color, one that's not usually
found in GTs as far as I can tell. Replacement interior parts were sourced from the UK.
There's still a lot of final debugging to do, of course. It's not a track car, but it has seen track
use in order to fine-tune the handling and work out any kinks in the suspension. That's a big part
of the fun. I'm still working on the car after another hiatus to run in the Targa Newfoundland, but
a car like this is never finished.
Features and Specifications
| Engine: | Chevrolet LS1 V8, 5.7l.
Stock LS1 intake manifold and ported heads.
Stock LS1 fuel injection.
XR259HR Crane cam, Crane RPM kit.
Engine computer and wiring from 1998 Camaro Z28 with a custom program.
Steering column wiring from a Miata, integrated into the MG harness. |
| Cooling: | Flyin' Miata dual-pass crossflow radiatorand dual Spal fan setup. |
| Exhaust: | custom tubular headers to 2.5" duals with X pipe feeding two Dynomax Super Turbo exhausts. |
| Transmission: | Tremec T56 6-speed, 0.50 top gear.
Stock Camaro clutch, custom driveshaft. |
| Rear End: | axle from an S10 Blazer.
Positraction limited slip differential from a 1998 Camaro Z28.
Custom axles from Moser Engineering. |
| Front Susp.: | custom subframe.
Mazda Miata control arms,
power steering rack and pinion,
steering column,
uprights, and
anti-sway bar.
Custom-built AFCO coilover shock absorbers.
375lb/in coil springs. |
| Rear Susp.: | custom three-link rear suspension.
Custom-built AFCO coilovers.
300lb/in coil springs. |
| Brakes: | (master) 1" Wilwood tandem master cylinder. 1974 MGB booster. (front) Miata calipers (2" piston) and vented rotors. (rear) Miata calipers (1.25" piston) and solid rotors. |
| Wheels/Tires: | Mazda Miata 14" wheels.
Falken Azenis 195/60-14 tires. |
| Chassis Mods: | undercar reinforcements ranging from 2x2 to 2x3 box sections as well as
extra bracing on top of the transmission tunnel.
Gas tank moved over 3" for exhaust clearance.
Front shock towers were tied into the unibody as well as the new frame. |
| Interior: | Updated MG wiring.
Optima battery.
No audio system yet, but a hidden system will be added.
Cool-It sound and noise insulation. |
| Instruments: | stock except for substitution of a Smiths electronic speedometer. |
| Exterior: | Volkswagen Rabbit fender flares to clear 4" wider track.
Special Tuning front air dam.
BMW Jet Black paint (shot at home!)
Biscuit interior.
Mix and match of various MG exterior bits to suit. |
| Weight: | 2376lbs wet. 52:48 weight distribution. |
| Performance: | estimated power between 350-400hp. |
| Completed: | June 2011. |

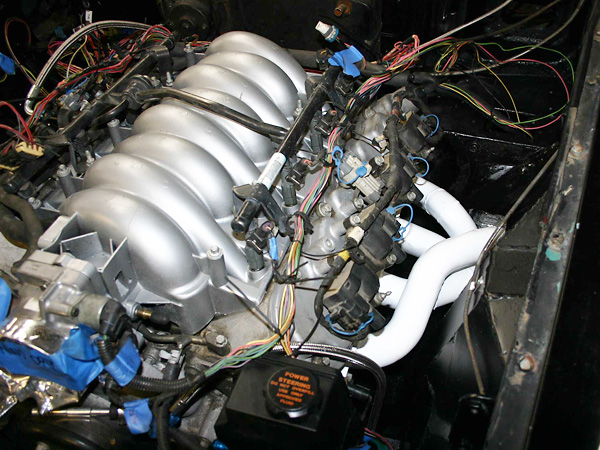
Engine Installation
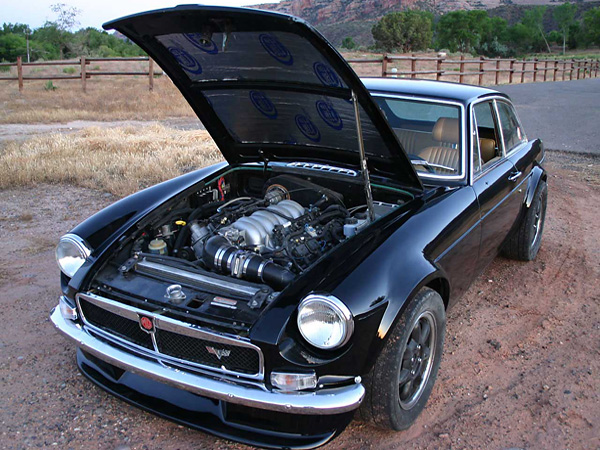
The final package.
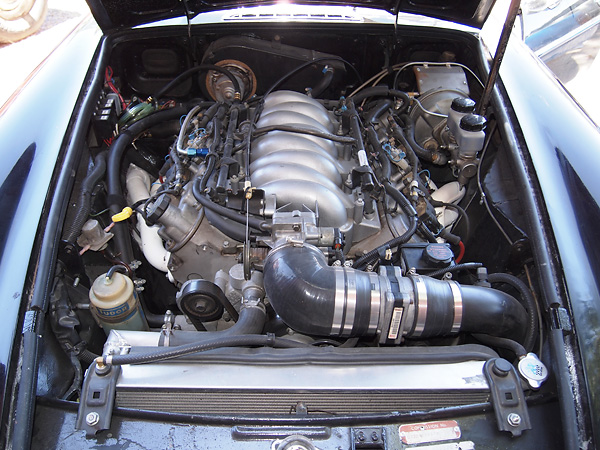
Chevrolet LS1 V8, 5.7l. Stock LS1 intake manifold and ported heads. Stock LS1 fuel injection.

The LS1 engine came with coil-on-plug ignition system.
The P-Ayr plastic engine block (from Summit Racing) simplified checking clearances.
Accessories bolt right to it!
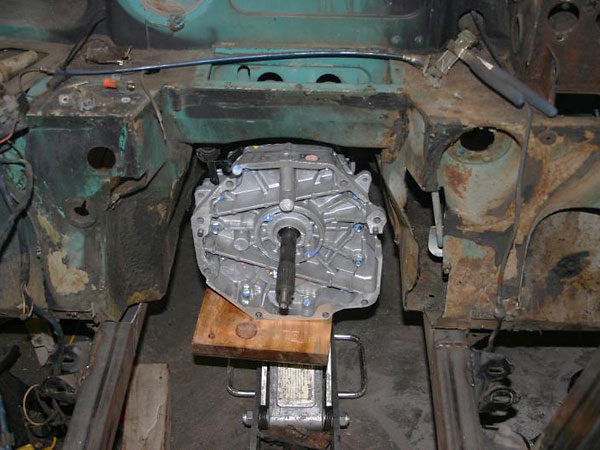
Trial installation of the T56 6-speed transmission.
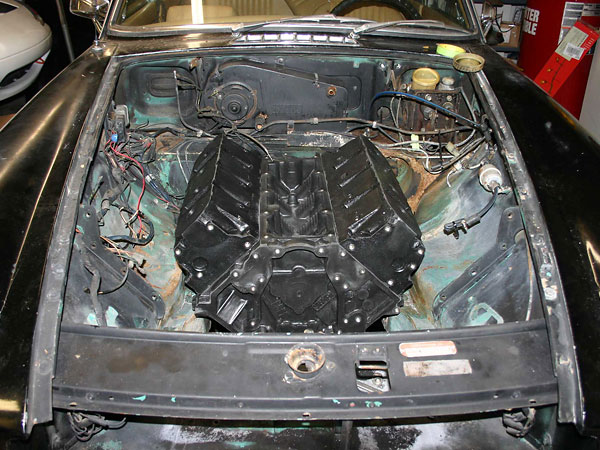
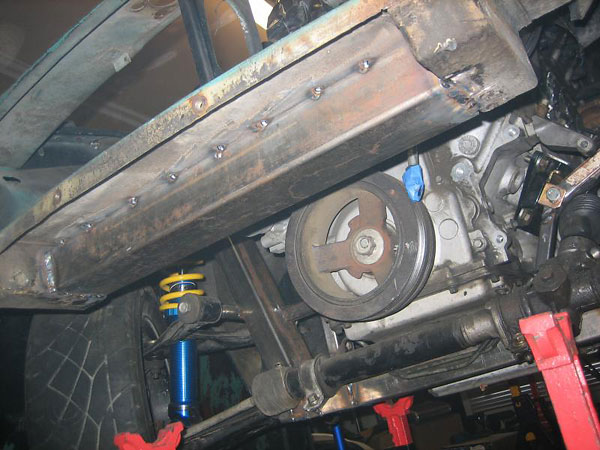
Engine compartment modifications to make room for the Chevy LS1 motor.
(These will be explained in more detail below, in the front suspension section.)
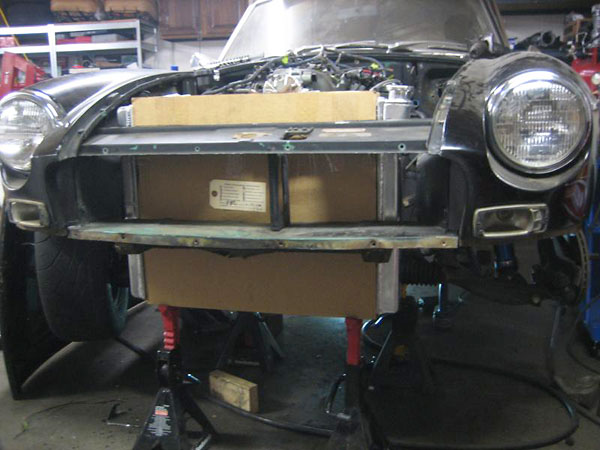
The initial plan was to use an off-the-shelf AFCO dual pass radiator, which measured 20x26
inches. These brackets were fabricated for it. Ultimately a shorter radiator was substituted.
Front reinforcement.
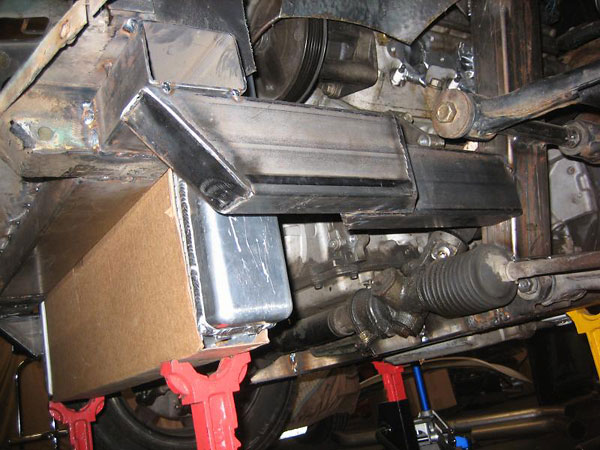
Tying the radiator mount back to the car's chassis.
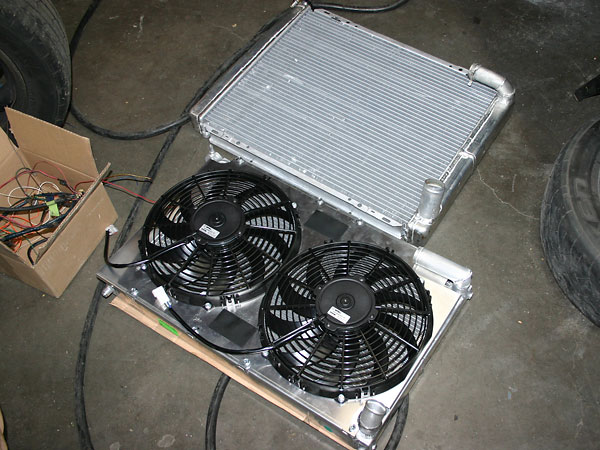
Foreground: Flyin' Miata crossflow radiator - developed for Miata V8 swaps - worked in the MGB
with only very modest alterations and dual Spal electric fan setup. Also shown: the larger
AFCO 20x26 dual-pass radiator Keith had installed previously.
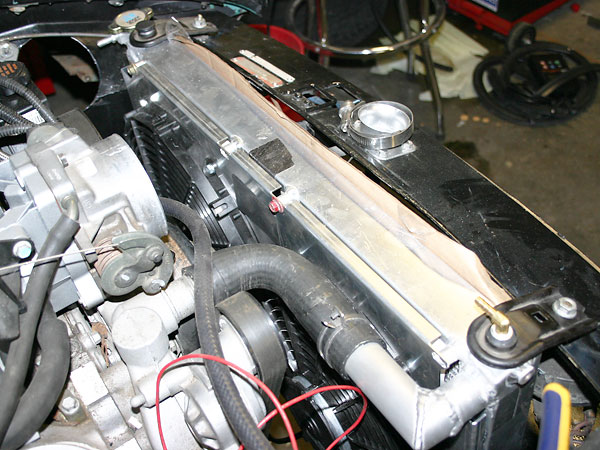
Upper coolant hose routing.
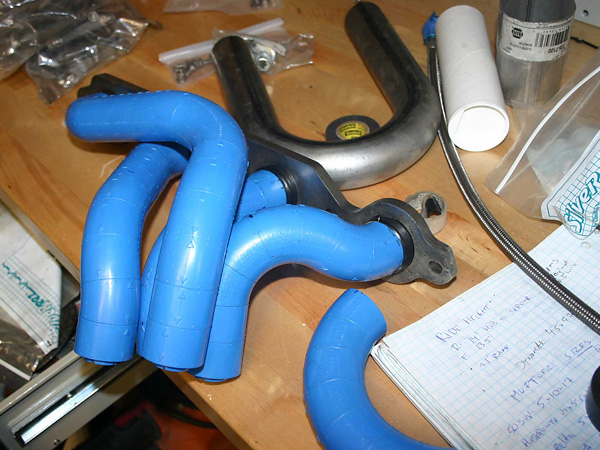
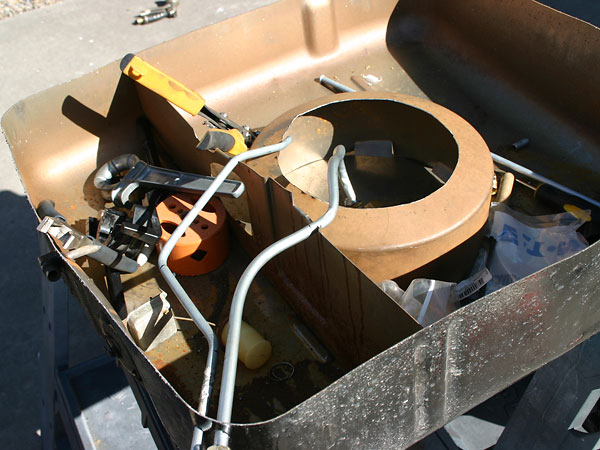
Ice Engine Works makes this wonderful tool for designing headers. Each segment is 1" long
and the company even offers a few different radii.
The design is translated from plastic model into off-the-shelf steel mandrel bends.
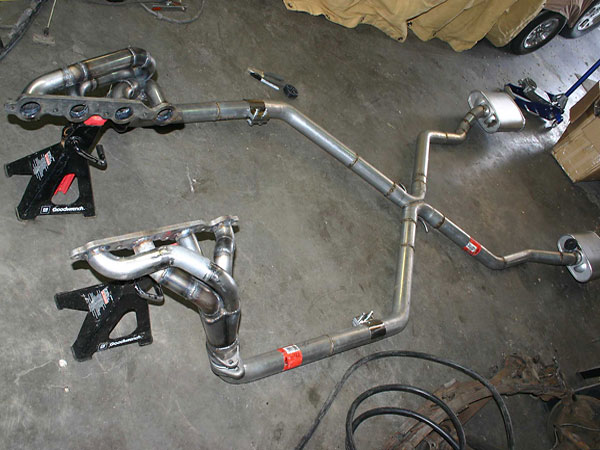
The complete dual exhaust system laid out on the floor. Goal? A nice sound but not too loud.
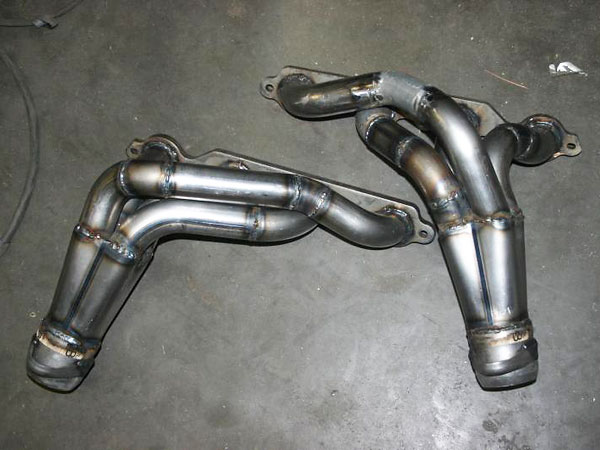
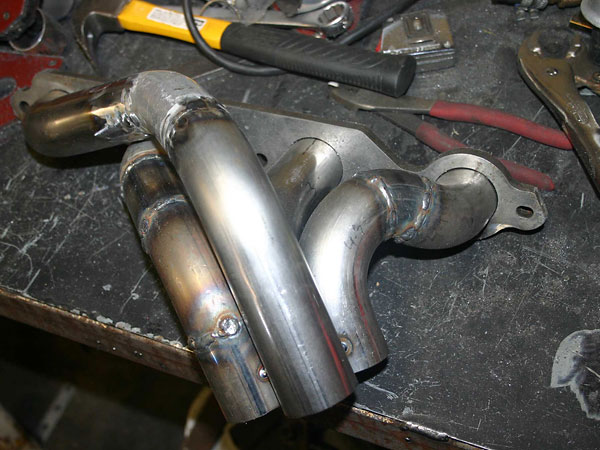
Custom fabricated four-into-one headers.
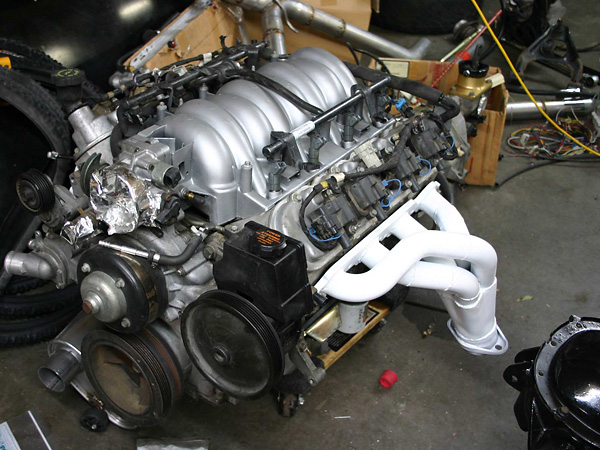
Engine ready for installation, with custom headers installed and painted.
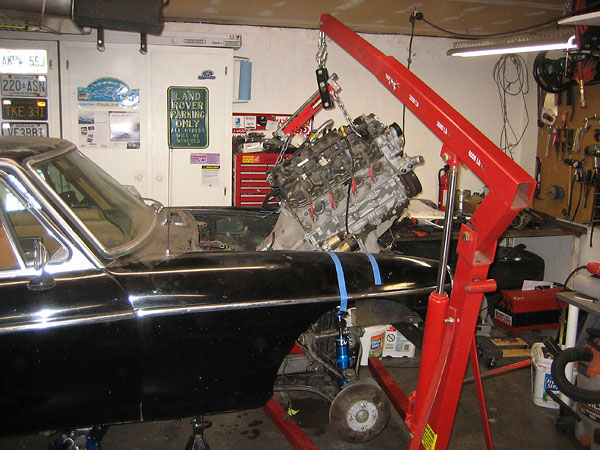
The Chevy LS1 engine goes in for the first - but not the last - time.
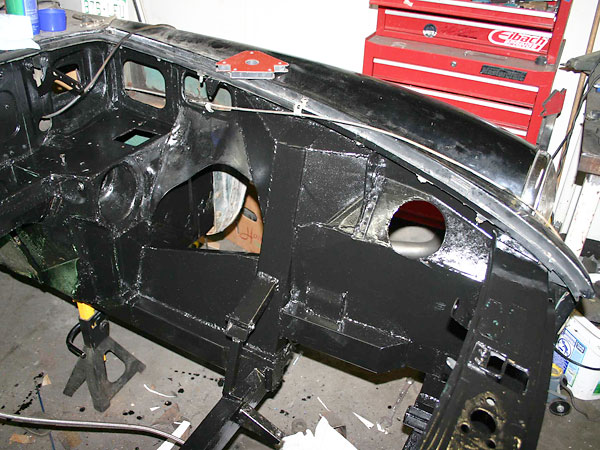
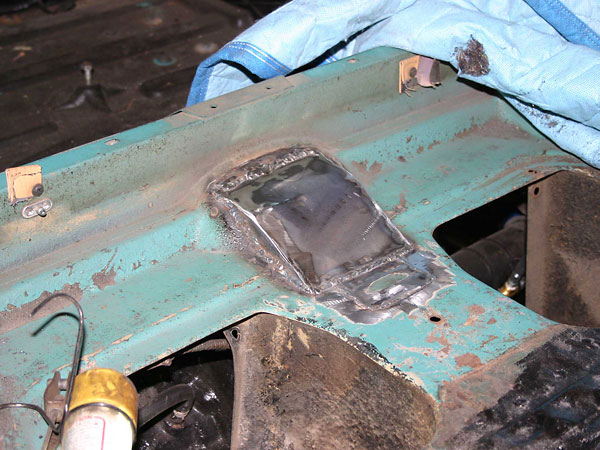
Once the framework was completed in the engine bay, panels tied it into the unibody.
Then it was all painted with POR-15. The hole up front is for the air intake.

Cut-outs to facilitate exhaust pipe routing.
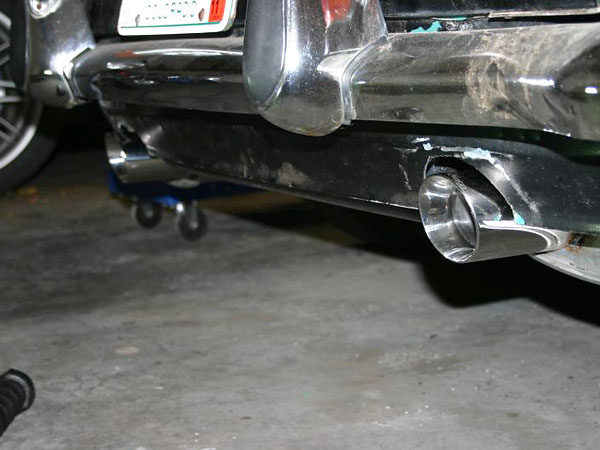
Dual wall exhaust tips.
Camaro wiring was easy enough to sort out. Merging it with the MG body harness as well
as the Miata steering column and combo switches required some study.
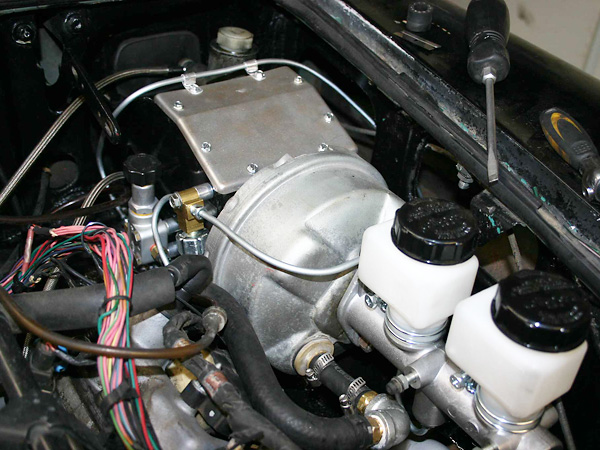
Brake pressure is handled by an MG booster and Wilwood master cylinder.
There's an adjustable proportioning valve on the rear line for dialing in bias.
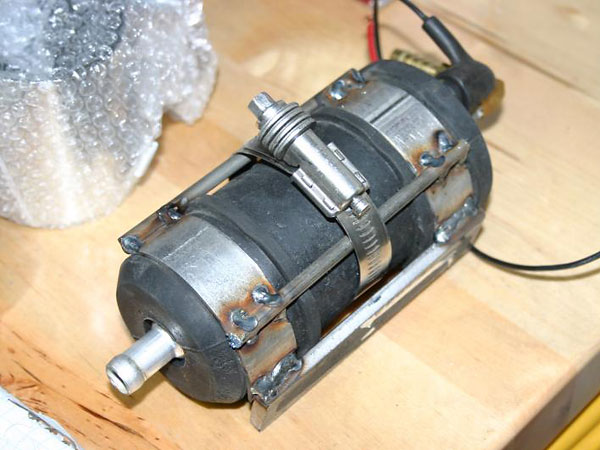
Pierburg high-pressure electric fuel pump.
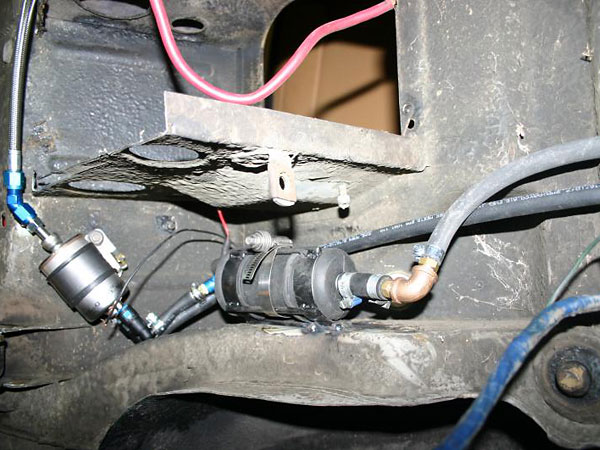
A modern Corvette fuel filter with an integral regulator is installed in nearly the same
location as the stock fuel pump (i.e. on the passenger side). In this view, the braided stainless
steel fuel line is running inboard, where it will turn left and continue forward to the engine.
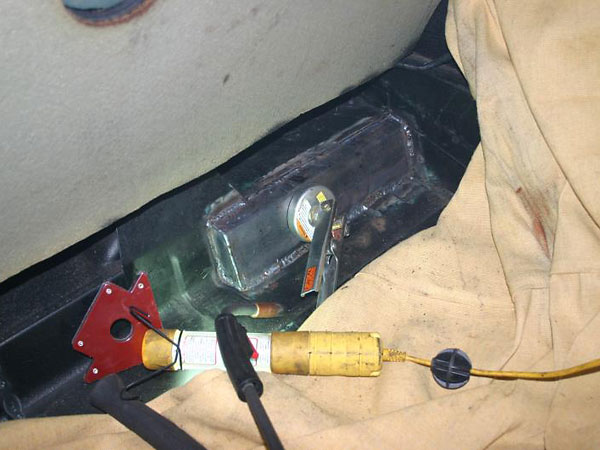
Alterations to the fuel tank including better baffles, improved pickup, and dedicated return line.
|
Enjoying this article? Our magazine is funded through the generous support of readers like you! To contribute to our operating budget, please click here and follow the instructions. (Suggested contribution is twenty bucks per year. Feel free to give more!) |
Front Suspension
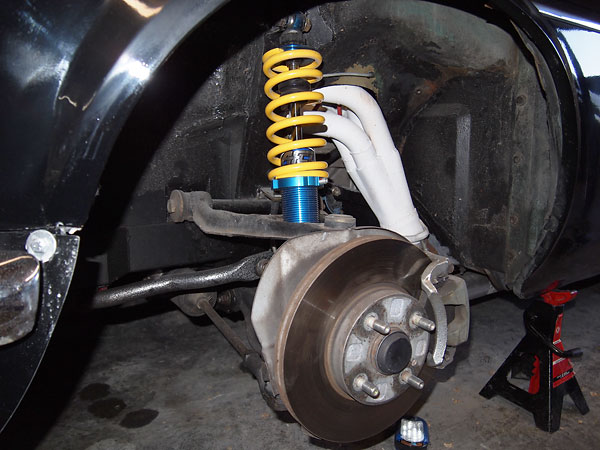
Mazda Miata front suspension: control arms, uprights, steering rack, brakes, wheels,
and alignment cams. Note also the doubled-up frame rails.
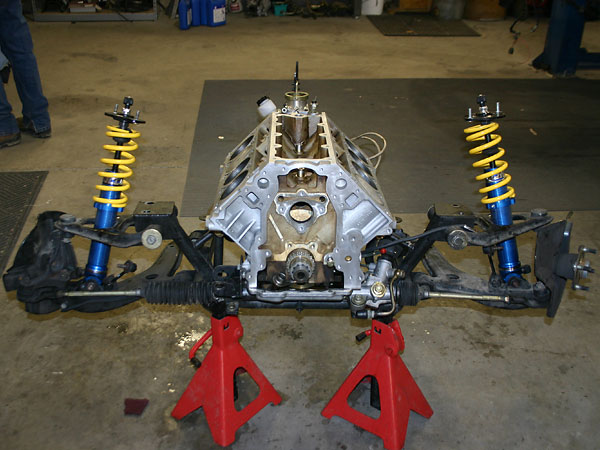
Miata suspension, wrapped around a bare engine block.
Mazda Miata suspension and brakes, plus AFCO coilover shock absorbers with 375lb/in coil springs.
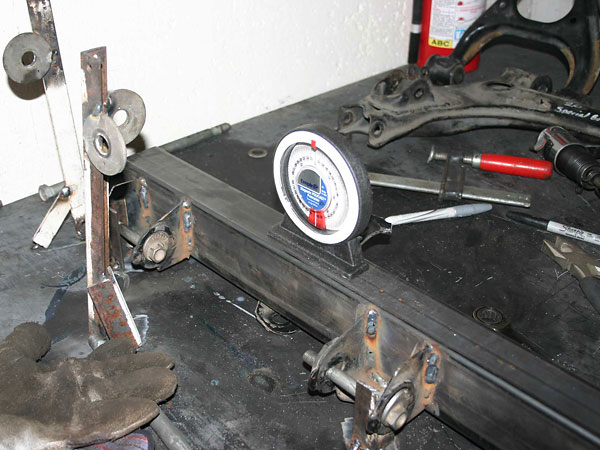
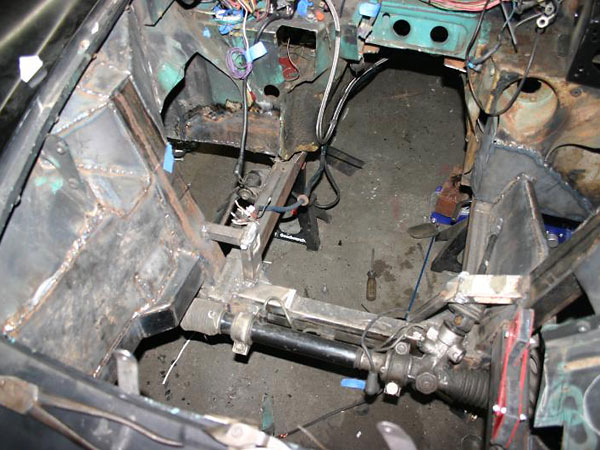
First step: building a jig for the new front suspension mounting points.
A Miata subframe provided the locations as well as the mounting brackets.
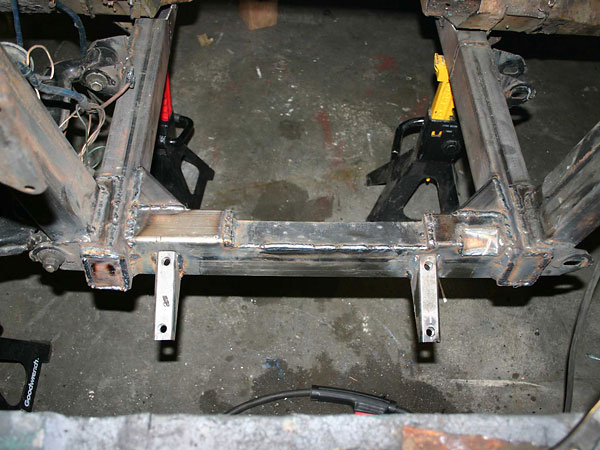
From the firewall forward, the MGB subframe was cut out and replaced with new parts.
The new subframe also continues rearward (beyond the firewall) for extra strength.
A cut-out in the cross bar provides oil pan clearance, and the bottom
of the bar is reinforced for better protection from road debris.
Rear Suspension
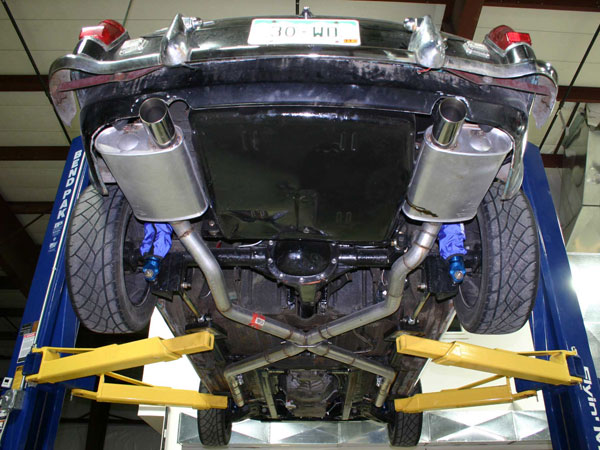
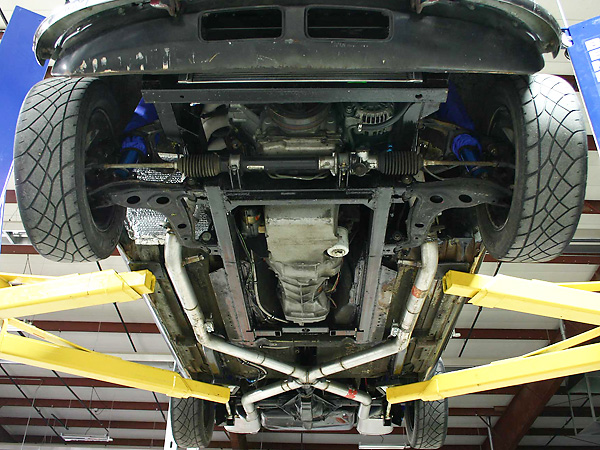
The exhaust system was difficult to package in the rear. It has to clear the Panhard bar,
rear axle, and of course the fuel tank.
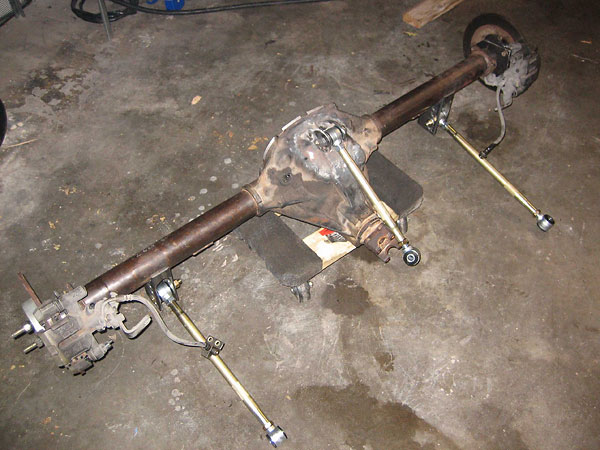
The rear end was sourced from a Chevy S-10 Blazer, but the Camaro contributed its limited
slip differential. Custom Moser axles with the correct flanges permit use of Miata rear
brake rotors and wheels. The suspension design was modeled after the Fast Cars setup
except with a different Panhard Bar location. Mr Roadster bushings are used in place
of rod ends in the suspension for a better ride and less wear.
The mounting bracket for the upper link required a bit of extra clearance in the body
at full compression.
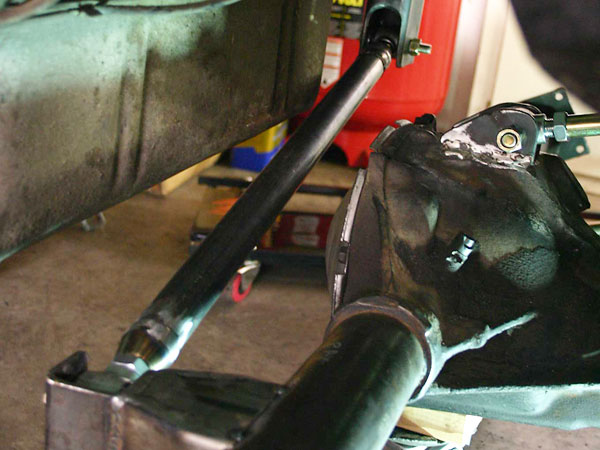
The Panhard Bar is mounted behind the axle. This allows it to be straight and thus stronger.
There's also a very solid mounting point by the fuel tank.
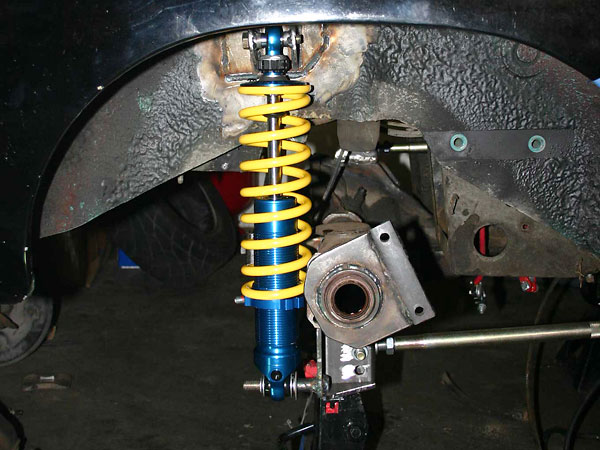
The springs and shocks are from AFCO Racing, based on a rally-bred set developed for my
Targa Newfoundland Miata. The mounting points for the lower links can be moved to alter
suspension geometry. Brackets for Miata disc brake calipers are welded onto the axle.
Interior
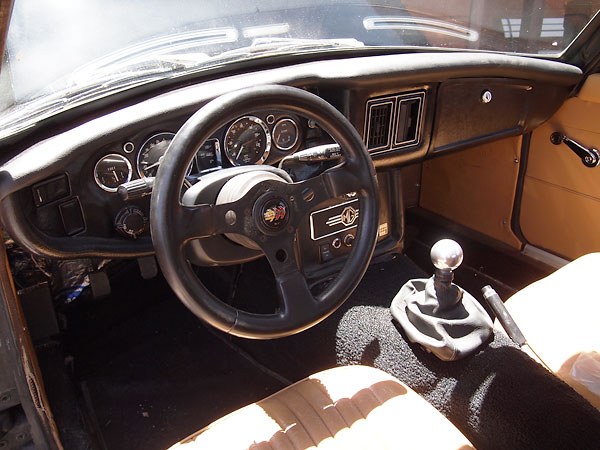
Stock dashboard, used with Mazda Miata steering column and stalk switches.
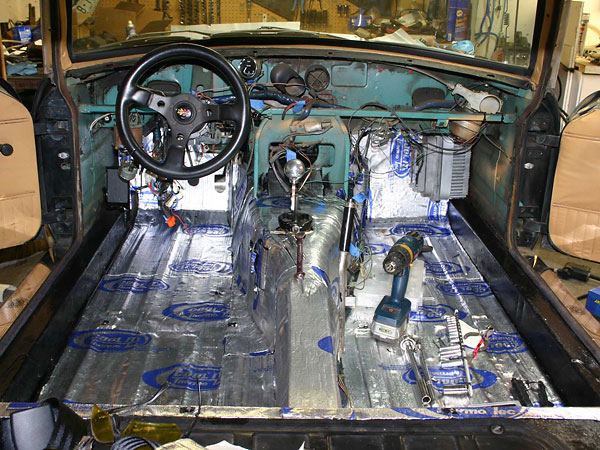
Cool-It sound and noise insulation.
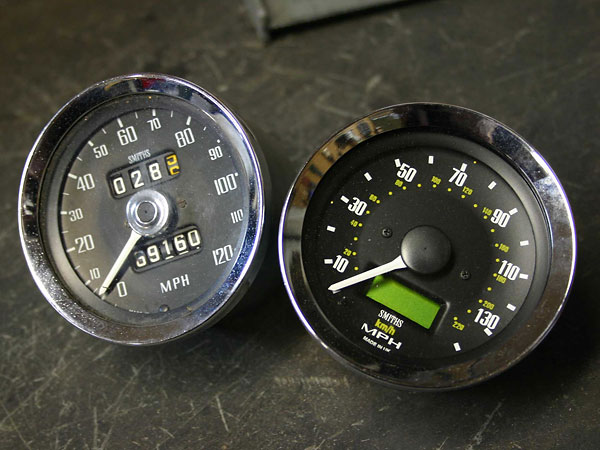
Smiths electronic speedometer.
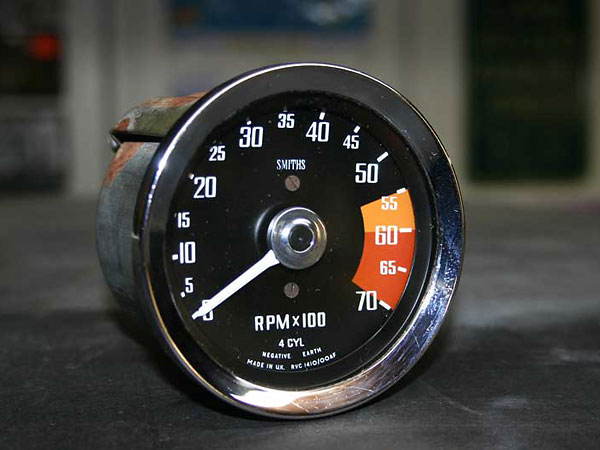
The inductive-style tach that came with my 1972 MGB wouldn't work with the electronic signal
from my LS1 engine. A later model MGB RVC tachometer solved the problem perfectly.

A Buss 100 amp circuit breaker is used as a main fuse, and a new secondary fusebox (at left)
has been added for constant power ("battery") circuits.
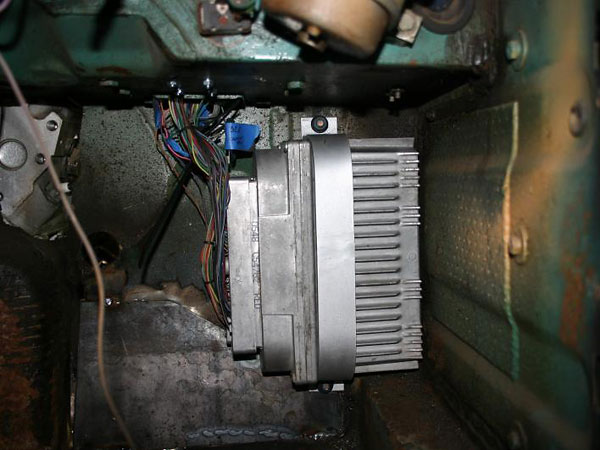
Chevy used this massive PCM in 1998 Camaros and Firebirds. Later cars got a more compact unit.
The T56 gear shifter came out in exactly the right place.
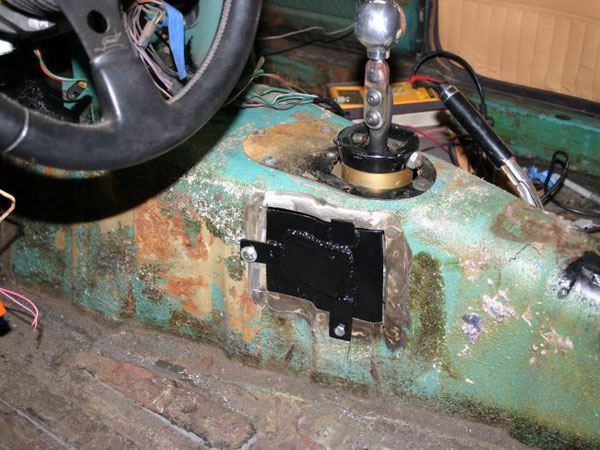
Hurst shifter for Borg-Warner T56 transmission. Cover for reverse lock-out solenoid.
Modification of the driveshaft tunnel to provide reinforcement where the uppermost link of
the three-link rear suspension ties in, and also clearance where that link routes rearward."
This modification provided clearance for a Panhard rod.
Fender Flares
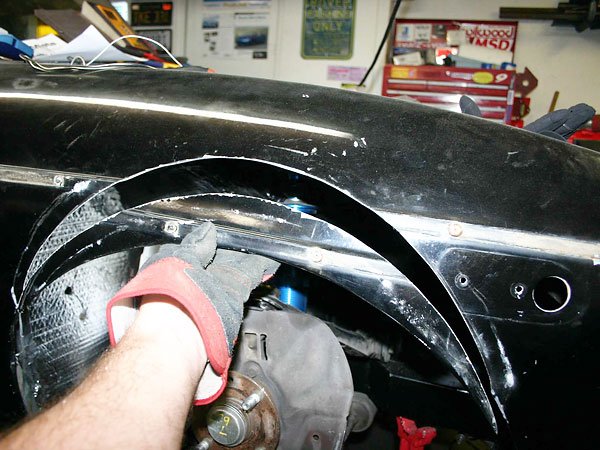
The first step in building the flares was to cut the fenders. With the suspension at full
compression, I traced a circle with the same radius as the tire from the center of the hub.
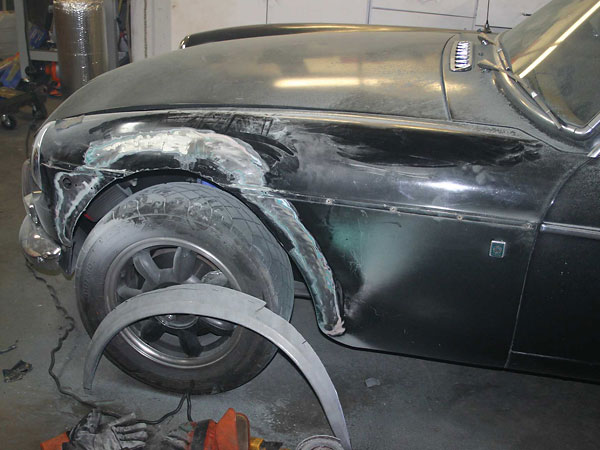
The flares came from a the rear of an early VW Rabbit. Here, the fender is taken down to
bare metal and the flare has been cut to fit the MG body. (Note the MG's original Aqua paint.)
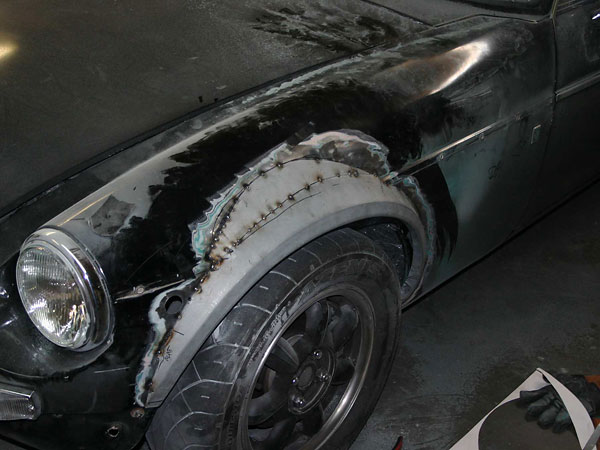
The MG has much curvier sides than a Rabbit, so a patch panel was needed to join the flare to
the fender. This panel was reworked a couple of times on one side to get the perfect shape.
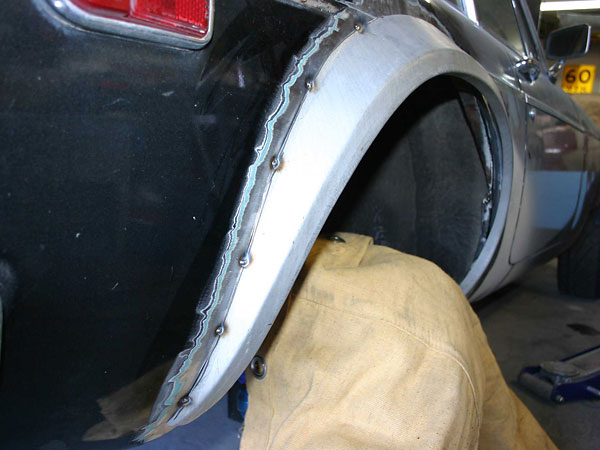
In the rear, the flares fit remarkably well. Another small patch panel was needed at the top,
but the shape of the lower half flatters the MG tremendously.
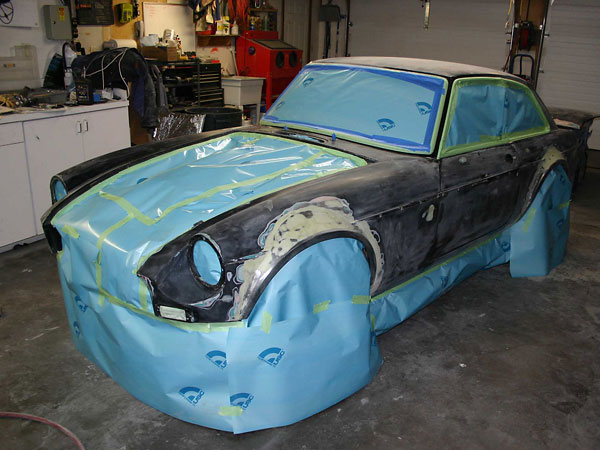
With the flares welded on, it was time for paint. Lots of careful sanding,
then a few coats of BMW Jet Black. The car was painted in the garage.
Exterior
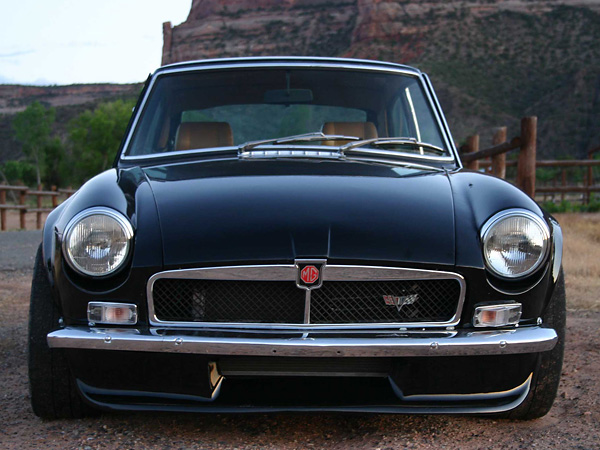
Fresh out of the paint booth. That's an MG Special Tuning air dam up front.
Missing only the stainless steel side strakes, you can see how the flares mold into the GT body.
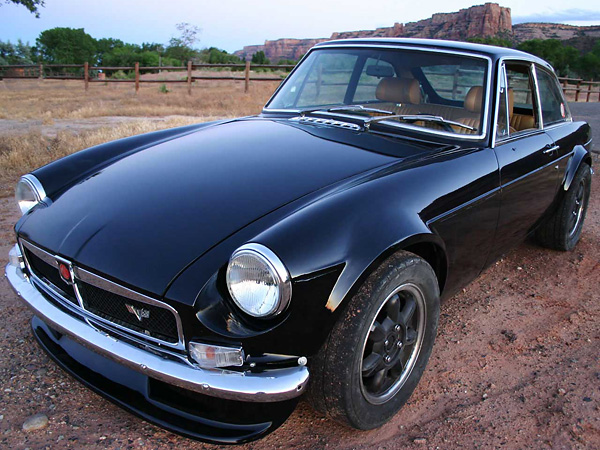
Completely assembled but wearing extra-wide race rubber.
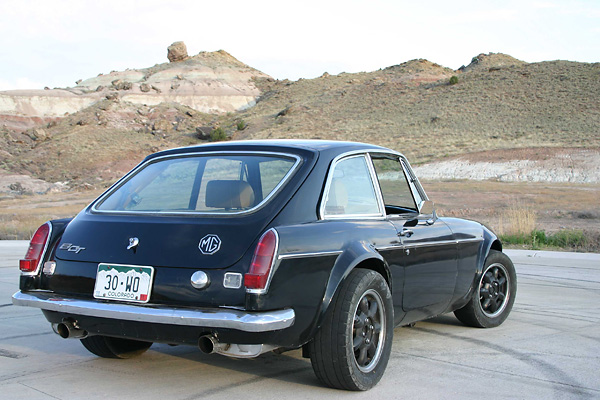
Ready for a track day, a spirited drive in the mountains, or just a trip to the store.
Additional photos and information can be found here: Keith's Build Diary
